
How to Create a Property
Add a service location and link it to a customer so you can create estimates for that site.
Who this is for: Owner, Office Manager.
Before you begin
Section titled “Before you begin”You need an existing customer to link the property to. See How to Create a Customer first if needed.
Open Properties
Section titled “Open Properties”Select Properties from the left navigation to see all service locations across your customers.
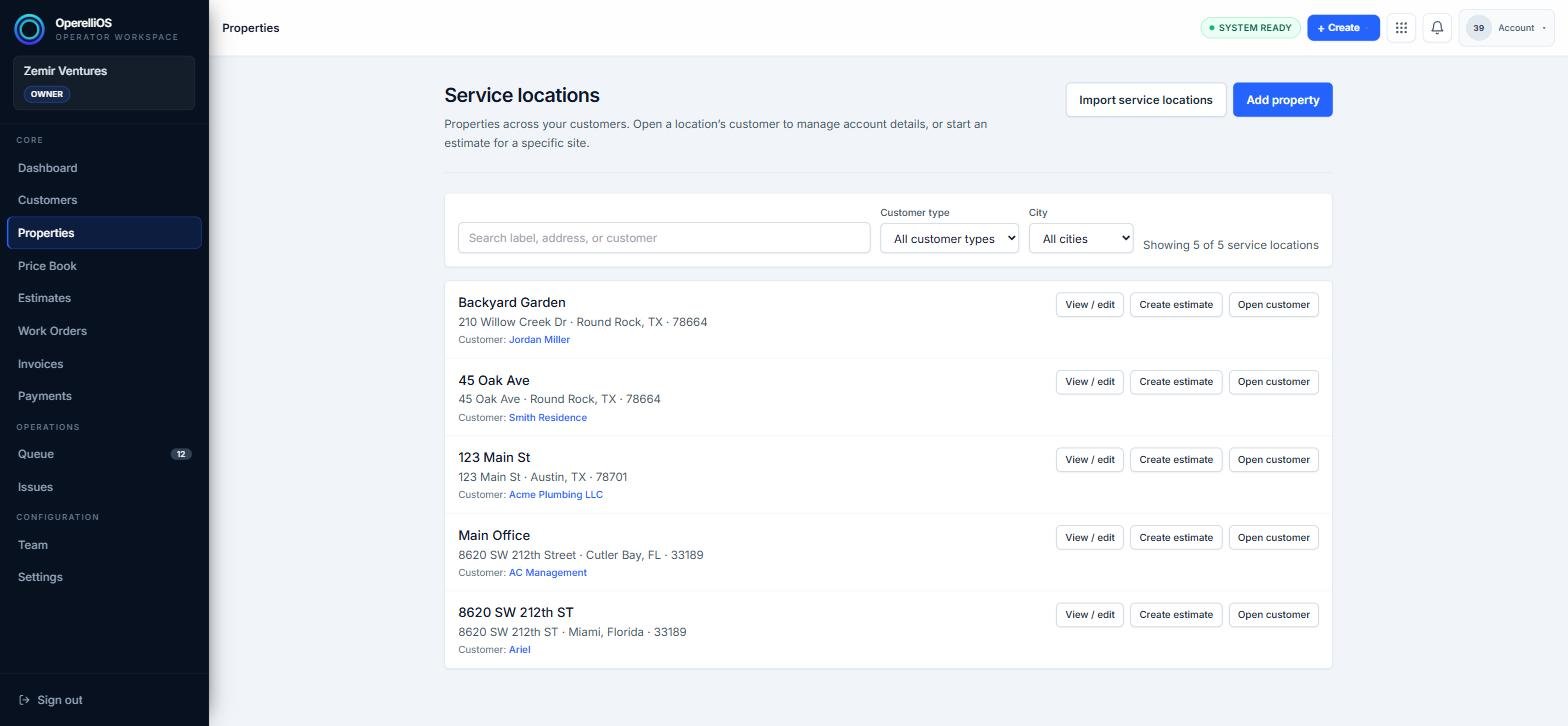
The Service locations directory before adding a new property.
Start a new service location
Section titled “Start a new service location”Click Add property in the top right. A dialog opens asking which customer this property belongs to.
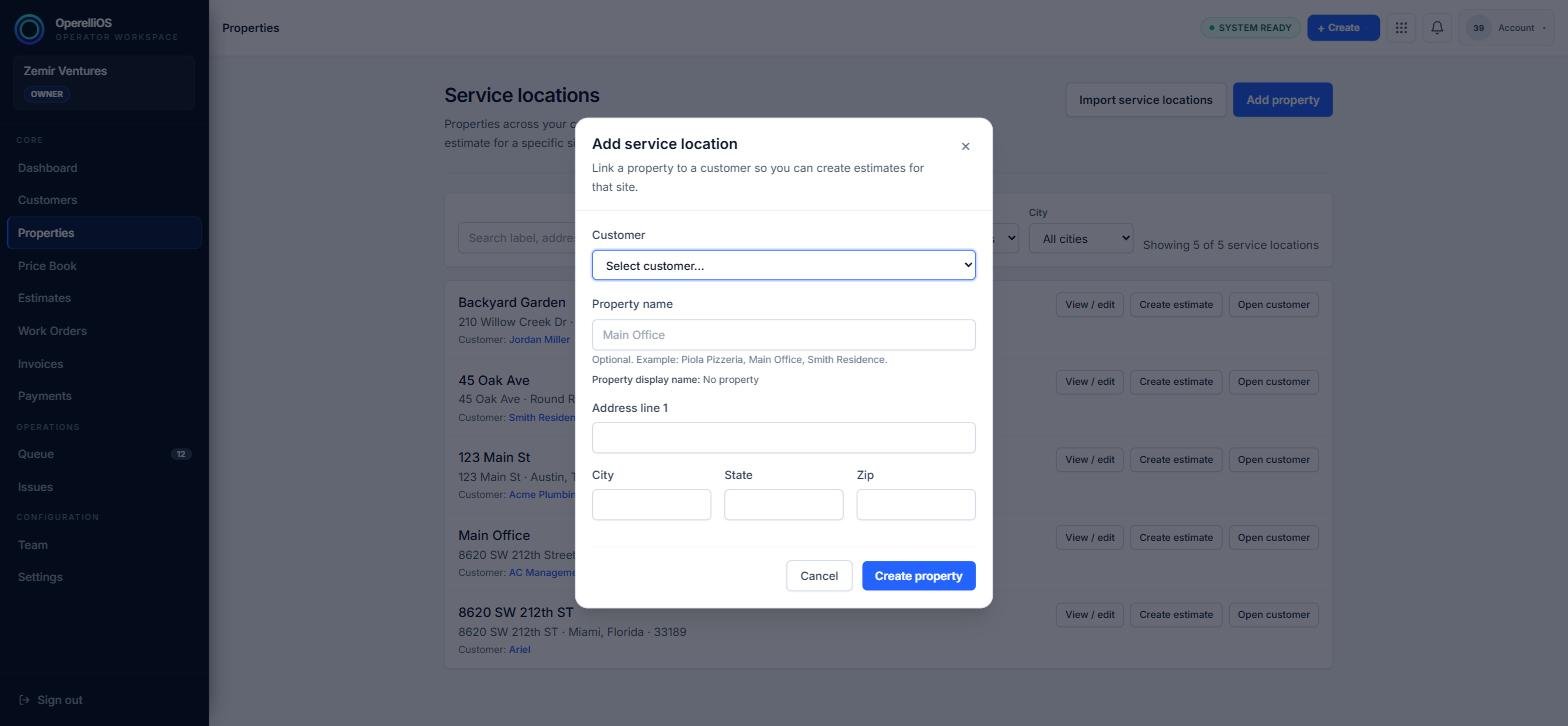
The Add service location dialog, before any details are entered.
Enter the property details
Section titled “Enter the property details”Select the Customer this property belongs to, then optionally give the property a name (for example, “Main Office” or “Backyard Garden”) and fill in the address, city, state, and zip.
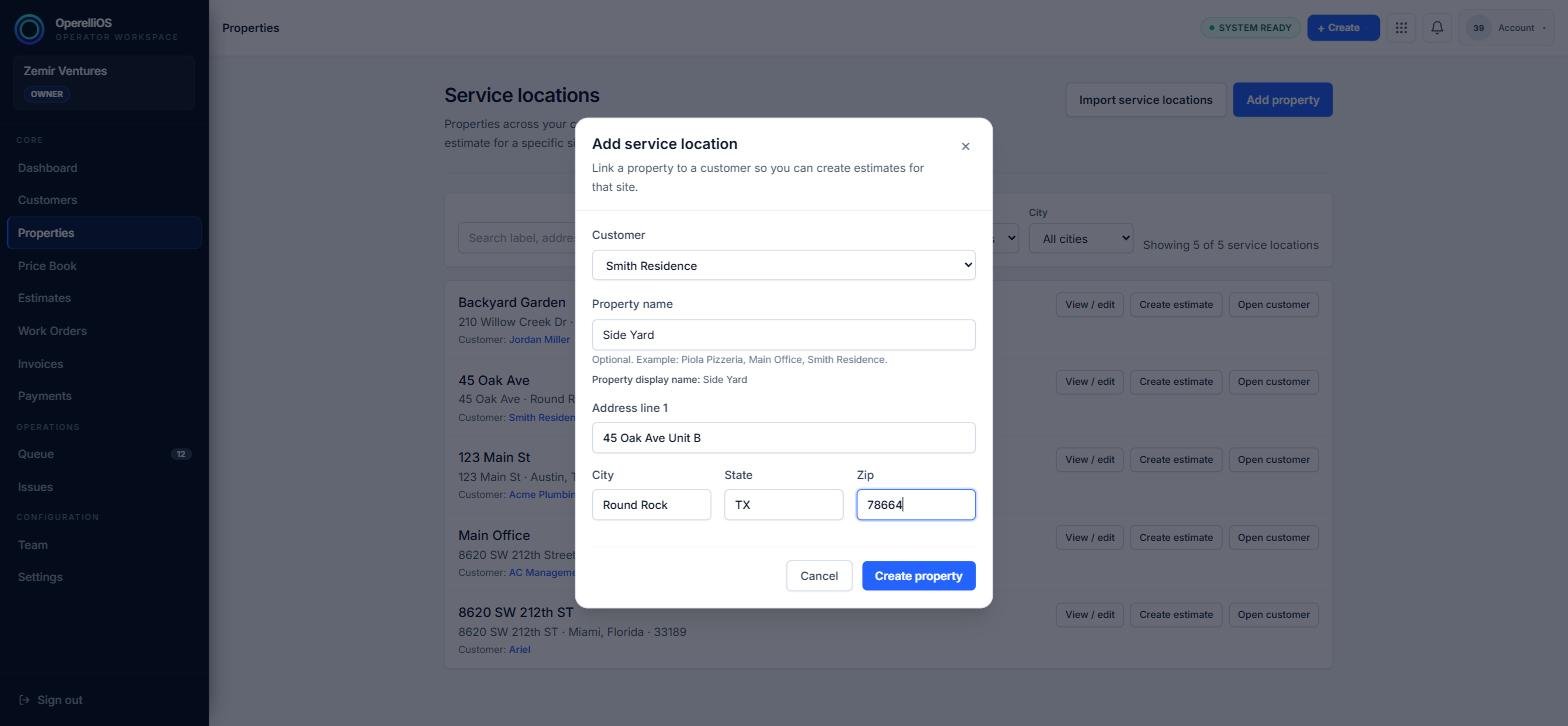
The dialog filled in with a customer, property name, and address.
Create the property
Section titled “Create the property”Click Create property to save the service location.
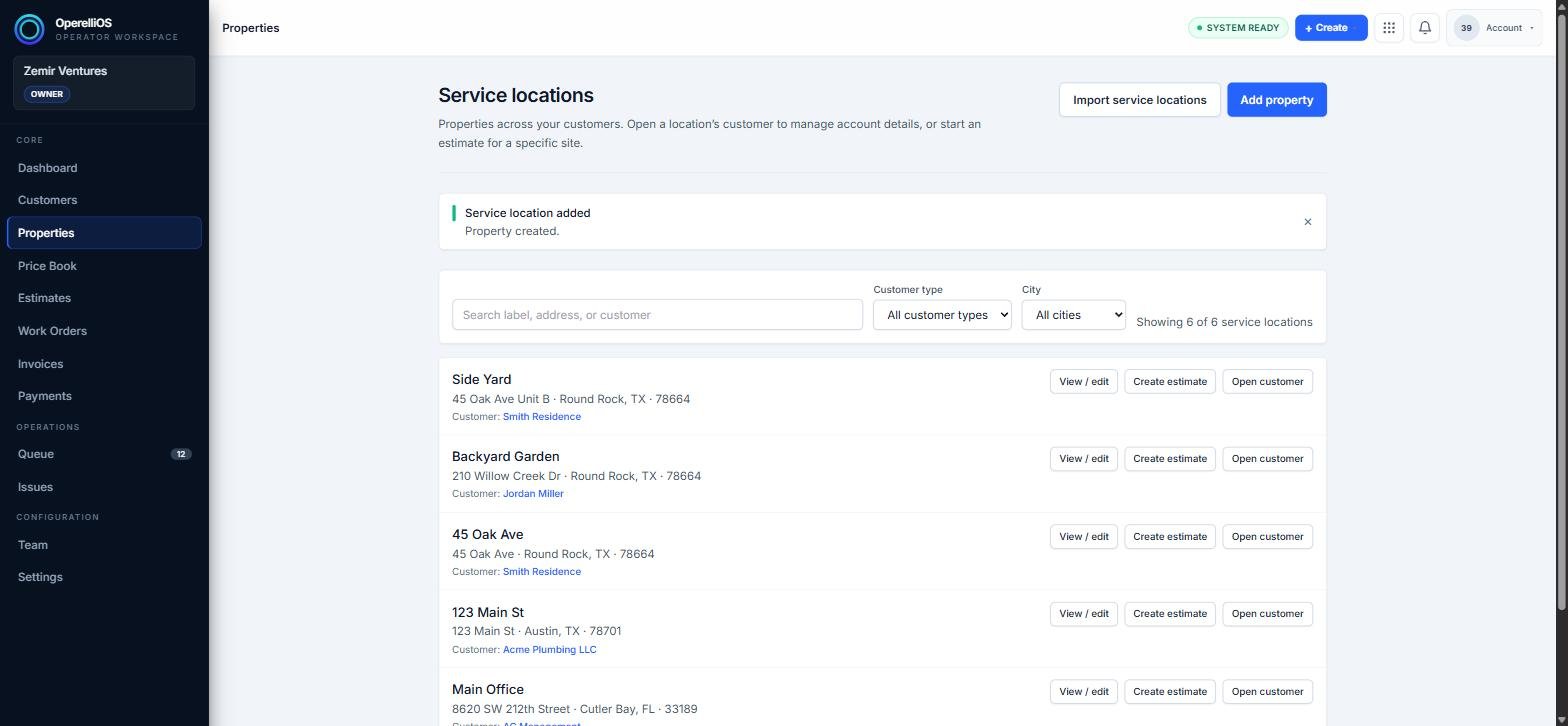
A confirmation banner appears once the property is created, and it’s added to the directory.
Expected result
Section titled “Expected result”The new property appears in the Service locations directory and on the linked customer’s profile, ready to use when creating an estimate.
Common issues
Section titled “Common issues”Create property is disabled
A customer must be selected before the property can be created.
The property doesn’t show under the customer
Refresh the customer’s profile page; the linked service locations list updates on load.